
Dreamy and timeless infant portraits begin before clients arrive. See 7 effective ways to prep your studio!

When I first began my newborn photography journey, I was about 24 years old and accidentally fell in love with baby portraiture. You see, I started out as a family photographer. At the time, my husband, Kevin, and I had our first baby, Emma, and capturing and connecting with families was my jam! However, as those families returned to me with their new additions, I instantly realized newborns are meant to be my specialty and my heart will forever belong to them.
Nevertheless, 5 years later I have worked very diligently and with much dedication to learn how to set my galleries apart and create wonderful works of art. The best advice I can give is to have a solid foundation and to ensure your studio is not only welcoming to parents, but also creates a calm, soothing environment so you may focus on your creativity. The space in which you work is how you set the stage for a great session! To date, I’ve photographed over 900 cherubs!
Here are 7 ways my studio is prepared so that the session runs very smoothly. This blog post is going to cover the following:
Temperature
White Noise
Lighting
Newborn Safety
Props & styling
Gear
Post Processing & Retouching
1) Toasty and Warm
Parents are often surprised how warm a studio needs to be when photographing a little one. While many pediatricians recommend your home be kept 68 - 72 degrees Fahrenheit, when you’re in studio the room needs to be warmer because the baby is naked. Remember, when your little one is at home sleeping they are often clothed, swaddled, and typically in a room without any stimulation.
My studio is usually kept at 77 degrees via my air conditioning. I have experimented with keeping the room a little cooler than most studios, but that is because I have space heaters on hand to supplement for warmth if needed. That way, the room itself has air circulating, though if the Baby is showing signs of being cold we can instantly have a source of heat without making the entire room overheated.
Even full-term and healthy newborns may not be able to maintain their body temperature if the environment is too cold. When babies are cold-stressed, they use energy and oxygen to generate warmth. By keeping babies at optimal temperatures, neither too hot or too cold, they can conserve energy and build up reserves.
2) White Noise | Sleepy Studio Vibes
If you’re not using a white noise app or machine of some sort, do yourself a favor and try one! My favorite option will help baby sleep soundly during their session.
White noise is the ultimate soother when it comes to putting a Baby to sleep. This is because this noise is gentle and very consistent; as parents, we often hold our new addition to our chest, softly bounce them, and whisper, “shh,” over and over. This repetitive sound is calming to your precious little baby. White noise mimics this sense of peace because life outside the womb can be a little overwhelming for a baby. Imagine spending 9 months in a perfect world; it’s dark, cozy, and everything you need is instantly provided. The womb is all your baby knows. Once they leave this cozy place, the sounds of the world can cause stress or over stimulation for them. White noise is simply familiar sounds that keep your baby calm and help them drift off to sleep.
3) Dreamy, diffused lighting
Lighting is the most important part of producing amazing galleries because photography is nothing without light. The word "photography" was created from the Greek roots φωτός (phōtos), genitive of φῶς (phōs), "light" and γραφή (graphé) "representation by means of lines" or "drawing", together meaning "drawing with light".
This in mind, I have chosen to use studio lighting, which is an artificial source, for the consistency it allows. Each gallery should be the same type of lighting no matter what time of the day you photograph sessions. While the lighting in my space has an ethereal, diffused look there is not a single window in my current studio. I create the soft, natural light look with several lights used in different manners.
Whether you’re team studio or natural lighting, choose a side, and be consistent! This will also make your editing much easier and allow you to do things such as creating your own presets and actions based on the type of white balance and other settings you utilize.
4) Newborn Posing & Safety
Always acting with caution and perceiving risks is a huge part of working with newborn babies. Before attempting many poses and setups, it is a great idea to take newborn safety courses such as mentoring, workshops, and other classes on lighting, handling, posing, editing, and many other responsible options. This is because the safety of handling a new baby is often done through post-processing tricks, such as the magic of the froggy position; the former link, for instance, shares step by step instructions on how I safely pose babies into this very advanced yet popular pose.
By taking workshops and choosing to mentor under an industry leader, you will have the confidence and knowledge to successful photograph your petite clients; this is part of creating an amazing studio environment because you should lead your session and never be unsure in what you’re doing.
Babies are absolutely precious and deserve to be treated with the utmost respect so I urge you to always practice newborn safety and training when working with them. Remember: this is a human life.
5) Props and Styling | Swoon-worthy
For my particular brand, all props are rustic, dreamy, and timeless! I use vintage-inspired floor props, which are the buckets, bowls, crates, baskets, and more!
Floor props are also a wonderful way to add variety to your session because baby may be wrapped or added into many different types of props so that your session is full of stunning images! We want each image to stand alone and be gorgeous.
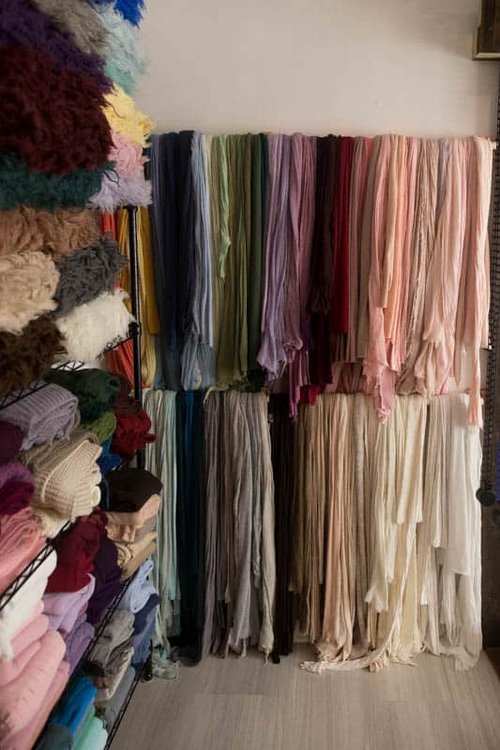
However, in addition to floor props, I have a huge stash of wraps and organic textiles, too. You’ll also find several flokati rugs, backdrop options, and more! By having a wonderful prop stash available, this enables you to create stunning baby and family portraits because you’re surrounded by everything you need. The options are endless and you’re only limited by your creativity; the more creative you are, the more ways you can pair items together. In fact, I have so many props on hand, I made a goal for 2019: do not purchase a single prop and truly be unique in my session design.
Layers and texture are a great accompaniment to newborn sessions, too, because you have contract, interest, and different types of fabrics. In general, however, I prefer knits of the jersey and sweater variety, particularly from responsibly sourced vendors who take pride in their craft.
Moreover, there are the sweetest nuances found within the daintiest of newborn headbands & tiebacks as well as caps, hats, and bonnets. All of your props and designs work together in harmony to showcase all things wonderful about a new addition to earth, a brand new baby boy or girl! However, please note that it has taken me about 5 years to collect this many props and my own unsolicited business advice to you is to purchase a few things at a time, learn to build your brand and style, and to be patient. You do not need every item at once, no matter how tempting it is. You’re a business and your profit and loss margins are very important!
6) Professional Gear | Lenses and More!
As of now, there are two popular brands for cameras and lenses: Nikon or Canon. I liken these to brands like Pepsi or Coke. Both are leading in their categories, but different people like different things, which is totally fine! I personally drive a Subaru Outback, but the Volvo is amazing, too, ha! Because quality is important to me, I use the best Canon lenses and camera bodies designed for professional newborn photography. Check out what’s in my camera bag for more details on my must haves.
Using professional gear is part of creating a perfect studio environment because your gear is your medium. Without sharp lenses and advanced focusing systems, for instance, you’re not the boss of the images. You need to tell your camera what to do. Sometimes clients say things to me like, “Your camera takes nice photos!” I, Sarah, take nice photos. My camera is simply a tool. Within reach I have two full-frame professional bodies as well as several prime lenses, such as the ‘L’ version and the Sigma ART versions.
These tools produce breathtaking images but because I set the white balance, shutter speed, metering for skin tones, aperture, ISO, and focal points, just to name a few. These can change at anytime. For instance, if you’re photographing a toddler sibling, they may move, so your shutter speed, aperture, and ISO would be different than if you’re photographing a baby in a bucket, for example, but at all times you must ensure the look is the same throughout the session for consistency. You adjust as you go.
7) Post-processing and retouching
After your set the temperature, turn on white noise, style your session, light your studio, photograph your session, this finally brings you to the final piece of the art puzzle: editing. I included this portion in a studio environment because editing is what makes the images shine and polishes them up for gallery preparation. At this point, you’ll have your own workflow on how you present images to clients, but the post processing, no matter how you showcase images, is truly important. In my studio, I have a custom built PC that is a dream! Not only is it super fast, but it is designed to fit my needs as a photographer.
For instance, this is when you’ll do your culling, and I’ve shared 3 tips on how I cull sessions, especially since I am habitually an ‘over-shooter’, ha! I also predominately use Lightroom for editing a posed newborn session.
During post-processing, your studio is where you’ll do all of the behind the scenes work. This is where you’ll create impeccable skin tones, remove baby acne, sharpen your images, adjust and crop, the list is endless! When editing, choose a time in which you feel relaxed and at ease.
And there you have it! While this blog post is lengthy, these 7 tips are the foundation to being one of the best newborn photographers in your area. As always, thank you for reading! Stay tuned for next week’s blog post in which I will share information about family photography, outfits, and ways we pose your children together to ensure safety.
Do you have further questions? Let’s connect, friends!